This is copied from here
FreeNAS
is awesome. Also, FreeNAS is hard… I recently switched from a
Synology device, and while I am already appreciating the increase in
functionality and power, it’s certainly not as easy to do some basic
tasks. One of those tasks is setting up a Time Machine share where all
of my household Macs can back up. Between reading the tutorials and
giving some trial and error myself, I think I have come up with a good
solution.
And before I get started with the step by step guide, let me reiterate
one thing: Permissions, Permissions, Permissions! If you ever find
yourself banging your head against a wall because something in FreeNAS
isn’t working as you expect it to, the likely culprit is permissions.
Once you wrap your brain around them, though, things become more simple.
Hopefully this guide helps put a foundation around that.
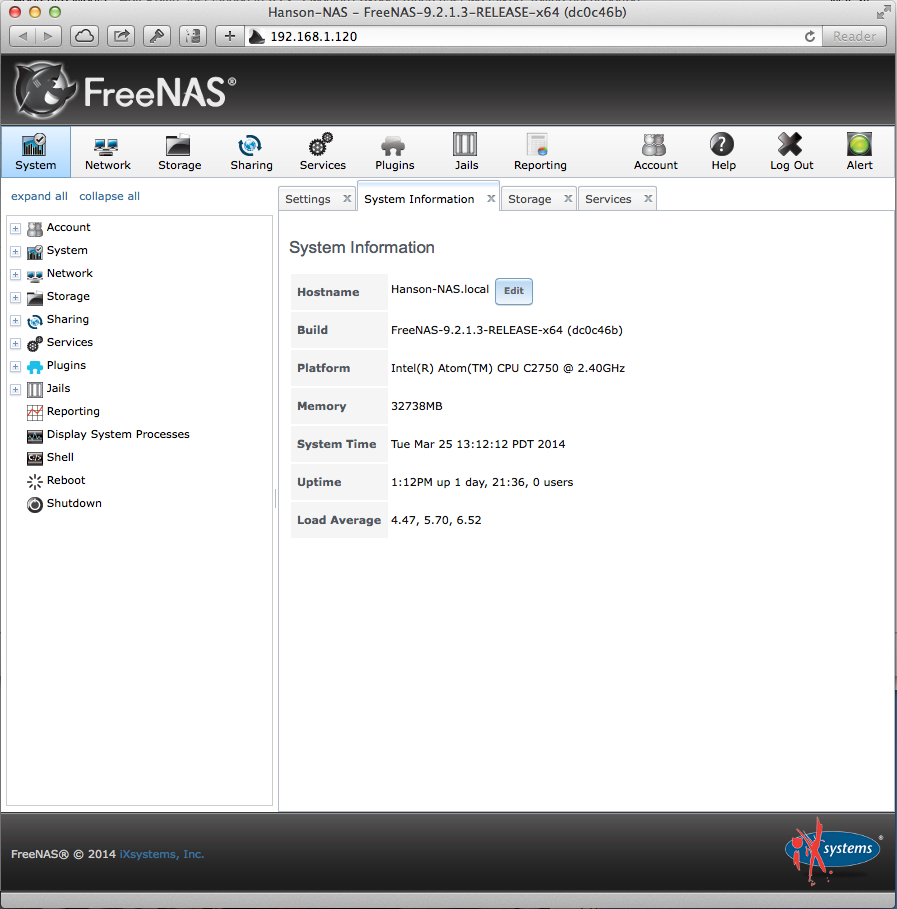
This article assumes that you have FreeNAS already up and running on
your network and that you’re able to connect to the main home screen
with your web browser. I recommend setting it a static IP, as well. Our
first step will be to create a group / user for Time Machine backups.
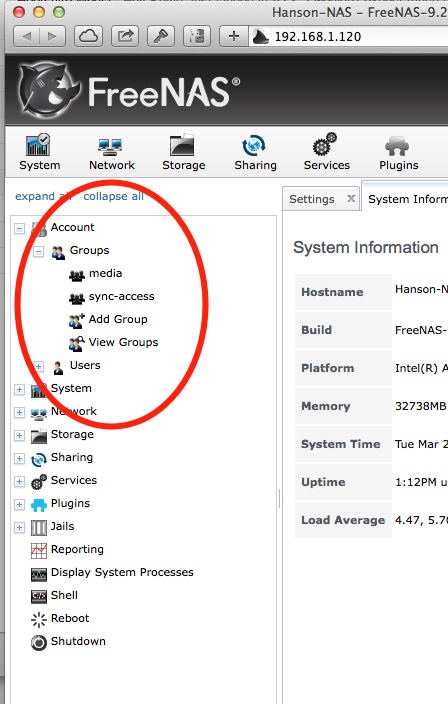
Under the “Account” section on the left, click “Groups,” and then click “Add Group.”
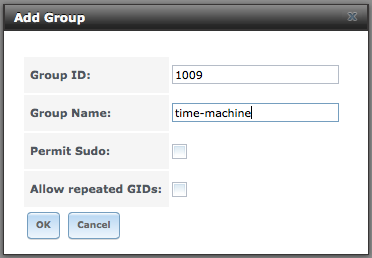
You don’t need to change the default value for the group ID, and put
something like “time-machine” for the group name. Leave everything as
default and click OK.
The next step is to create a ZFS dataset where we’re going to put the
Time Machine backups. The dataset must be on a ZFS volume. I’m assuming
you have already created a ZFS volume with your disks here, but if you
haven’t stop reading this guide and go read the FreeNAS ZFS documentation here.
If you have already created the volume, create a dataset. Datasets can
be nested inside of other datasets so I actually have one dataset called
“Backup” and inside of that one, I have one callled “Time-Machine” ~ it
really just depends on how you want things set up.
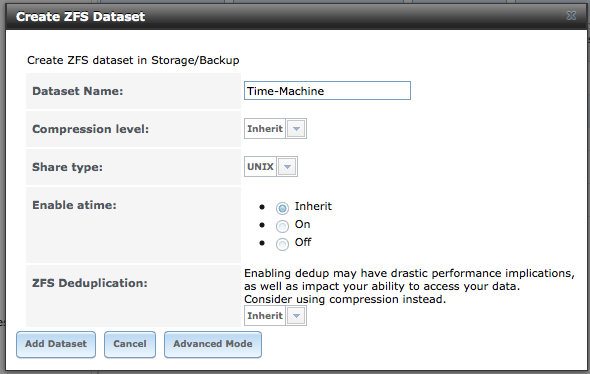
After you enter the name, “Time-Machine”, leave all of the default
values alone. The below screenshot shows how I have “Time-Machine”
nested inside of my Backup dataset.
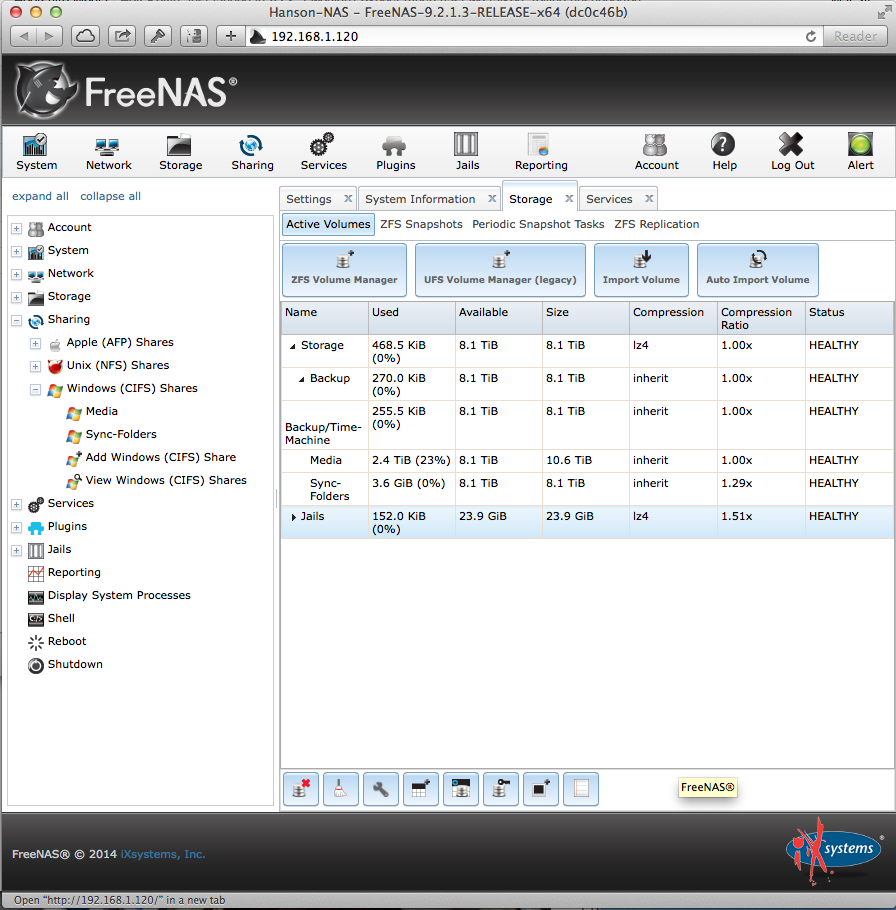
So now we have a dataset. This is going to be where all of our Time
Machine backups get saved. The next step is the most important and the
one that has bitten me before… so don’t forget it. We need to change
the permissions on the “Time-Machine” dataset. Recall that we initially
created a group called “time-machine” – we are now going to set things
up such that any user in the “time-machine” group can write to the
“Time-Machine” dataset. Click on the “Time-Machine” dataset and then
click on the icon with a key on it to change its permissions.
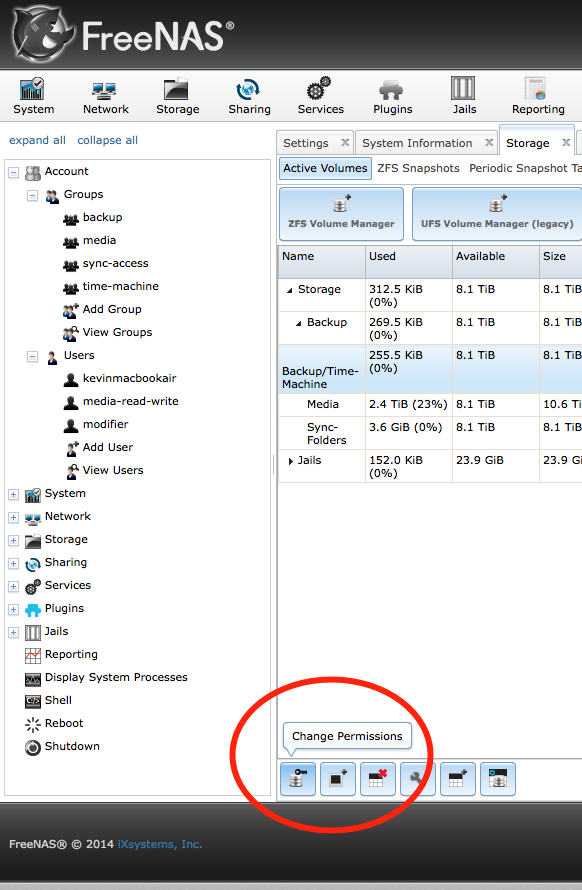
When you click that, a permissions dialog box will pop up.
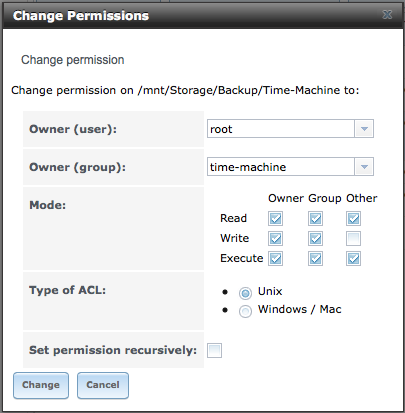
I chose not to change the default user owner of “root.” However,
definitely change the group owner. In the drop down box, the
“time-machine” group that we previously created should be selectable.
Click that and then make sure to have the boxes checked as I have in the
image above. We want any user in the group to have read / write /
execute privileges.
Click the “Change” button to have the new permissions take effect.
Now it’s time to create a user for the Time Machine backup. I believe it
is best to create a separate user for each computer (and I’ll explain
why at the end of the post) so just create users that reflect that
computer. For example, the user I’m creating is called
“kevinmacbookair.”
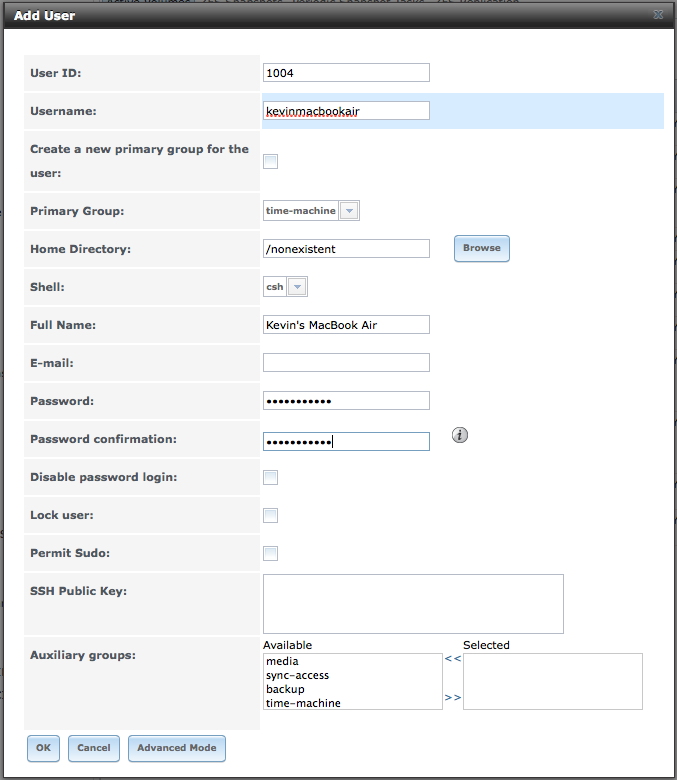
Once again, you navigate over to the left column to create a new
user. Leave the “User ID” field as the default. Give your username a
simple lowercase name like mine. Uncheck the box about creating a new
primary group for the user. Instead, go to the drop down list and select
“time-machine” in there. In the full name, put a descriptive name. Type
in a password, and then you’re good to go.
So what we’ve done so far is created a group called “time-machine”
which has full access to the “Time Machine” dataset. Next we added a
user that is part of the “time-machine” group. Easy! The last thing we
need to do is create an AFP (Apple Filing Protocol) share that will
broadcast this over the network so your Mac can see it. To do this,
click the “Sharing” link on the column on the far left and click the
button to create a new AFP share.
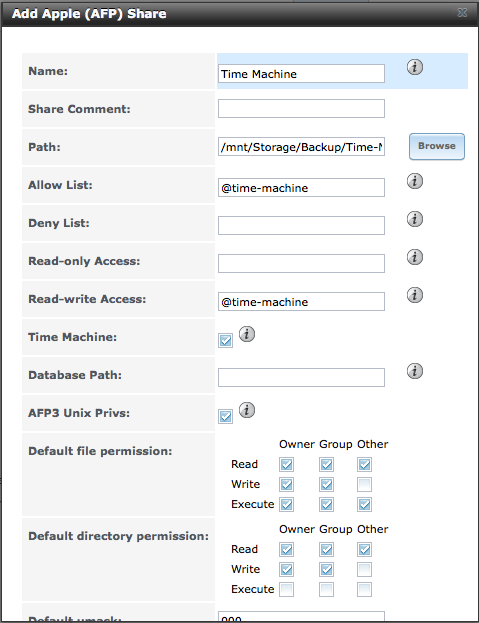
Name your share something you like, and then use the file browser to
make sure that the “Path” is set to the ZFS dataset that we created for
our Time Machine backups. Next, for the “Allow List” and “Read-write
Access” fields, we want to put the group that we created, “time-machine”
~ however, because it’s a group and not a user, we need to put the “@”
symbol in front of it: “@time-machine”. Next make, sure the “Time
Machine” box is checked. Finally, take a look at those check boxes of
privileges and make sure they match what’s listed above. Then click OK.
At this point, we’re done with everything on the FreeNAS system. It’s
now time to set up Time Machine on the Mac!
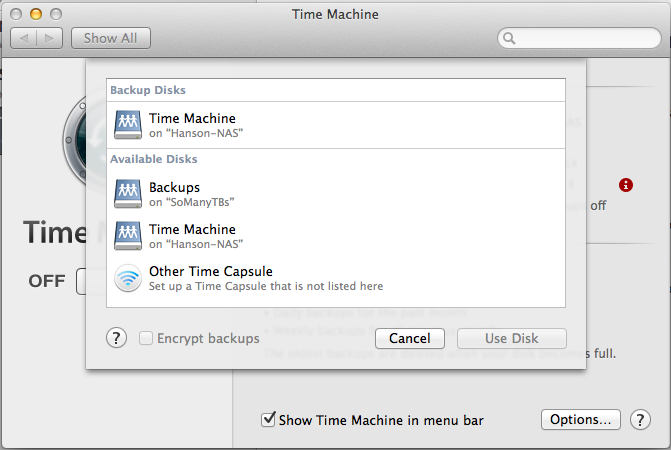
On the Mac, just open up the Time Machine preferences, and if you go
to select a disk, you should find the one we created there! It will ask
you for a username / password, and you want to make sure you enter the
machine-specific one we created in FreeNAS, not your OS X username /
password.

You should be golden! If you want to add more than one computer, you
don’t need to add any new AFP shares or anything like that. Just create
new users for each machine, and make sure that each user is part of the
“time-machine” group that we created earlier. The final improvement to
make this work even better would be for us to cap how much space each
computer has to back up. For example, my MacBook Air has 256GB of space,
and anything on my MacBook Air is also on my other machines so I really
wouldn’t want to give it more than 300GB of usable space for historical
backups. Time Machine will automatically delete the older ones if it
runs out of room. On the contrary, my MacBook Pro is loaded up with all
of my important data and I might want to give it 2x the space of its
SSD. Right now there isn’t a great way to do this for multiple Macs in
FreeNAS, but a feature is coming soon that will make it easy! This feature is per-user quotas. This will allow us to specify the maximum amount of space each user is allowed.
I hope this guide was useful!