Original post can be found here
Updated Jul 31, 2016: Moved away from letsencrypt-auto and switched to certbot, updated the auto-renewal script, and changed the suggested cron time to weekly. Also made mention that mFi series has been discontinued. Finally, fixed the install instructions for Unifi Video.
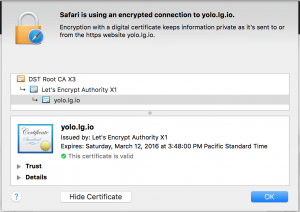
Wow – I got myself a free signed SSL cert for my WiFi controller!
Lets Encrypt recently was released and is definitely super interesting. They basically issue SSL Certificates for free. SSL Certs typically would cost hundreds of dollars per domain and even more for Wildcard certificates. It’s insane, it’s essentially an entire industry predecated around artificial pricing for something that is essentially zero cost to generate and maintain. Not to mention holding back security and encryption on the web since not just anyone can afford hundreds of dollars a year for a cert. This entire industry is holding back progress at a massive scale, so we’re going to fix that 🙂
With Lets Encrypt, this is all free now. As cost is no longer a problem, we can encrypt other communication like router config landing pages and other services. No need for self-signed certificates that your browser freaks out about when navigating to. Now we can have real certs!
As I’m a big fan of Ubiquiti products, I’m going to show some examples in this article for how to use Lets Encrypt to generate certificates that are compatible with the mFi automation stuff, Ubiquiti’s Unifi wificontroller and their Unifi Video series for surveillance. Ubiquiti, as they’re an enterprise company, [imo wrongly] expects companies to want to host the backing controller software for these devices on-site. We’re going to host them on EC2 though, so we don’t need to manage servers or have people tripping over power cables. Since we’re on the internet though, we need proper SSL to prevent the NSA and all their shenanigans.
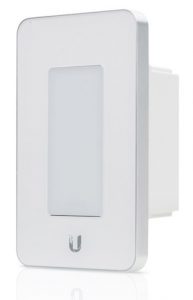
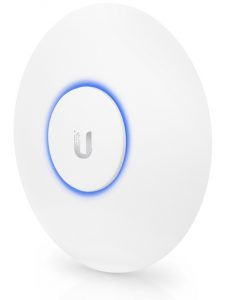
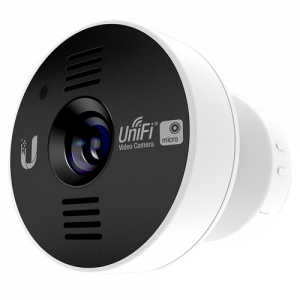
Ubiquiti’s mFi, Unifi wireless and Unifi Video micro camera. They all need a hosted controller.
Note: This article will be specific to configuring Ubiquiti’s services, but the Lets Encrypt instructions are the same regardless of what kind of service you might want.
Note: Also heads up that the mFi line of products has currently been discontinued by Ubiquiti. Instructions here should still work though.
So, lets get started!
Part A: Provisioning an EC2 server w/ Lets Encrypt
Lets Encrypt is somewhat unusual in the way it works. Essentially yes, they give out free certificates, but they need to be renewed every 3 months. Not sure why this is, but my guess is it has something to do with that they’re free. As such, on whatever server you’re using to host your service, you’ll need to have a cronjob that runs Lets Encrypt on that server. Otherwise your cert will expire, and you’re going to have a bad time.
Go to AWS EC2 and create an instance. For Ubiquiti products, I’ve found that even one t2.micromachine can run all three of the servers we’ll be deal with in this artice. If configured right, you might even be able to stay in the AWS Free Tier
- Type: t2.micro
- OS: Ubuntu Server 14.04 LTS
- Storage: ~30GB (maybe more if you’ll be doing a lot of video recording)
- Ports to open: At least port 443 for the Lets Encrypt verification, but depending on the Ubiquiti service (all TCP unless otherwise specified):
- mFi: 6080, 6443
- Unifi: 8081, 8080, 8443, 8880, 8843, 3478 (UDP)
- Unifi Video: 6666, 7080, 7443, 7445, 7446, 7447
Part B: Install the Ubiquiti services you’d like
You’ll need to add Ubiquiti’s repositories so you can use apt-get to easily install the right services.
- mFi:
echo \'deb http://dl.ubnt.com/mfi/distros/deb/ubuntu ubuntu ubiquiti\' | sudo tee -a /etc/apt/sources.list.d/100-ubnt.list
sudo apt-key adv --keyserver keyserver.ubuntu.com --recv C0A52C50
sudo apt-get update
sudo apt-get install mfi
- Unifi:
# note that you can change stable to unifi5 for v5
echo \'deb http://www.ubnt.com/downloads/unifi/debian stable ubiquiti\' | sudo tee -a /etc/apt/sources.list.d/100-ubnt.list
sudo apt-key adv --keyserver keyserver.ubuntu.com --recv C0A52C50
sudo apt-get update
sudo apt-get install unifi
- Unifi Video:
# visit https://community.ubnt.com/t5/UniFi-Video-Blog/bg-p/blog_airVision for the latest version instructions.
# here\'s version 3.3, though there may be a newer version by now:
wget http://dl.ubnt.com/firmwares/unifi-video/3.3.0/unifi-video_3.3.0~Debian7_amd64.deb
sudo dpkg -i unifi-video_3.3.0~Debian7_amd64.deb
After the installation of the packages you want, you should be able to go to the https endpoint to see the page. It’ll be: https://:6443 for mFi, https://:8443 for Unifi, and https://:7443 for Unifi Video.
Problem is, you’re using a self-signed certificate, so your web browser will complain. Next, we’re going to use Lets Encrypt to get a real certificate.
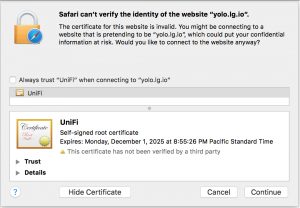
Self-signed cert’s not so hot. ;(
Part C: Generating the signed certificate with Lets Encrypt
Lets install Lets Encrypt now. Reminder that this needs to be done on this server, not your local machine. We’ll be using certbot and essentially the instructions there.
wget https://dl.eff.org/certbot-auto
chmod a x certbot-auto
./certbot-auto
That last line will configure certbot and also install some dependencies.
Now, using certbot, we generate the signed certificate. So lets run the wizard:
./certbot-auto certonly
Select option 2 (to use a temporary webserver), then enter your email (so you get alerts if things go wrong), agree to the agreement, then finally type in your domain name (along with the subdomain). If everything went well you should get a Congratulations message.
Part D: Load the certs into the services
The Ubiquiti services are Java-based and they use the Java Keystore as a way of storing the private keys and certificates. We first need to generate a PKCS #12 certificate from the raw ones we just received:
sudo openssl pkcs12 -export -inkey /etc/letsencrypt/live/mysubdomain.mydomain.com/privkey.pem -in /etc/letsencrypt/live/mysubdomain.mydomain.com/fullchain.pem -out /home/ubuntu/cert.p12 -name ubnt -password pass:temppass
Again, don’t forget to replace mysubdomain.mydomain.com with your domain name. Everything else can remain as-is.
Now for each service you’ll need to load the PKCS #12 certificate into its own keystore.
- mFi:
sudo keytool -importkeystore -deststorepass aircontrolenterprise -destkeypass aircontrolenterprise -destkeystore /var/lib/mfi/keystore -srckeystore /home/ubuntu/cert.p12 -srcstoretype PKCS12 -srcstorepass temppass -alias ubnt -noprompt - Unifi:
sudo keytool -importkeystore -deststorepass aircontrolenterprise -destkeypass aircontrolenterprise -destkeystore /var/lib/unifi/keystore -srckeystore /home/ubuntu/cert.p12 -srcstoretype PKCS12 -srcstorepass temppass -alias ubnt -noprompt - Unifi Video:
sudo keytool -importkeystore -deststorepass ubiquiti -destkeypass ubiquiti -destkeystore /var/lib/unifi-video/keystore -srckeystore /home/ubuntu/cert.p12 -srcstoretype PKCS12 -srcstorepass temppass -alias ubnt -noprompt
Basically all that’s different is the keystore location of the service, and the password Ubiquiti uses to protect it.
Finally, delete the PKCS #12 files (since they’ve already been imported), and restart the services (as appropriate)
sudo rm /home/ubuntu/cert.p12
sudo /etc/init.d/mfi restart
sudo /etc/init.d/unifi restart
sudo /etc/init.d/unifi-video restart
That’s basically it! You should go to those same urls as before and you’ll now hopefully have your browser not complaining. 🙂
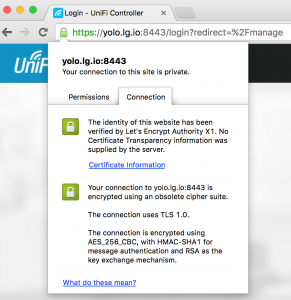
The browser likes it!
Part E: Automating Lets Encrypt certificate renewal
As mentioned before, Lets Encrypt certificates only last 3 months. As such, we’ll need to get this machine to attempt to renew the certificates probably weekly and then place the new certs back into services. It’s essentially doing parts C and D on a scheduled job using cron. Weekly can seem like a lot, but it’ll fail fast if no renewal is necessary.
Create a new file /home/ubuntu/renew_lets_encrypt_cert.sh and customize it according to what you used in Parts C and D. No sudo needed since cron will run it automatically as a super user. Use full paths to files. Here’s an example:
# Get the certificate from LetsEncrypt
/home/ubuntu/certbot-auto renew --quiet --no-self-upgrade

# Convert cert to PKCS #12 format
openssl pkcs12 -export -inkey /etc/letsencrypt/live/mysubdomain.mydomain.com/privkey.pem -in /etc/letsencrypt/live/mysubdomain.mydomain.com/fullchain.pem -out /home/ubuntu/cert.p12 -name ubnt -password pass:temppass

# Load it into the java keystore that UBNT understands
keytool -importkeystore -deststorepass aircontrolenterprise -destkeypass aircontrolenterprise -destkeystore /var/lib/mfi/keystore -srckeystore /home/ubuntu/cert.p12 -srcstoretype PKCS12 -srcstorepass temppass -alias ubnt -noprompt
keytool -importkeystore -deststorepass aircontrolenterprise -destkeypass aircontrolenterprise -destkeystore /var/lib/unifi/keystore -srckeystore /home/ubuntu/cert.p12 -srcstoretype PKCS12 -srcstorepass temppass -alias ubnt -noprompt
keytool -importkeystore -deststorepass ubiquiti -destkeypass ubiquiti -destkeystore /var/lib/unifi-video/keystore -srckeystore /home/ubuntu/cert.p12 -srcstoretype PKCS12 -srcstorepass temppass -alias ubnt -noprompt

# Clean up and use new cert
rm /home/ubuntu/cert.p12
/etc/init.d/mfi restart
/etc/init.d/unifi restart
/etc/init.d/unifi-video restart
Make sure to make this executable:
sudo chmod x /home/ubuntu/renew_lets_encrypt_cert.sh
Lets start modifying the crontab file with sudo crontab -e and put the following at the bottom:
1 1 * * 1 /home/ubuntu/renew_lets_encrypt_cert.sh
This will schedule the certificate renewal every week on Monday at 1:01am
And now you’re really done! You have a free SSL certificate by Lets Encrypt being automatically renewed and assigned to the different services on a monthly basis.
Thanks for reading!